A practical guide to bulk price adjustments in WooCommerce
Running an online store often means adjusting prices and other product information. Here, I'll show you how to change the price in WooCommerce for individual products and in bulk.
In this detailed guide, we'll explore everything there is to know about changing product prices in WooCommerce. Here's an overview of what we'll discuss:
- How to change the price in WooCommerce for individual products.
- How to change prices in bulk in WooCommerce.
- How to change prices based on user roles in WooCommerce.
- How to schedule a price change for a specific time frame.
First, I'll show you what's possible with WooCommerce's built-in features. Then, I'll share 4 powerful add-ons that make changing product prices much quicker and easier.
The tools covered in this post:
- Setary - The ultimate WooCommerce bulk edit tool, complete with bulk price changes for products and variations.
- WooCommerce Discount Manager - The best plugin to change prices for sales and discount promotions.
- WooCommerce Wholesale Pro - The best plugin to change prices in WooCommerce based on user roles.
Let's jump right in.
How to change prices in WooCommerce without plugins
There are three built-in methods to change prices in native WooCommerce:
- Individually per-product: Changing the original prices and sale prices from the Edit product page of each item.
- In bulk for multiple products: Using the bulk product editor from the "Products" list table.
- In bulk via a CSV file: Using the CSV Product Importer tool to export a CSV file that contains products and prices, updating the prices, and re-importing the CSV.
I'll cover each of these methods in detail in a minute. However, it's important to note that there are limitations to changing product prices using WooCommerce's native options.
Key limitations of WooCommerce's default price change feature
- Works best with simple products. While you can update WooCommerce prices individually for each product, you can't edit variable products, grouped products, or other complex product types.
- It can be tedious. If your store has a large product catalog, such as hundreds or thousands of products, it will take forever to manually update product prices.
- CSV technicalities. Updating product prices in bulk via a CSV file isn't the easiest thing to do. You must properly structure the column headers and data when creating and formatting your CSV file. If you make a mistake, you'll have to troubleshoot and fix the file. WooCommerce beginners or non-technical users might struggle with this.
Nevertheless, there are still some situations where the native options work fine. And if they're not enough for you, then I'll tell you about the best WooCommerce bulk edit plugins for a wide range of price adjustments below.
Without further ado, let's look at how to update prices in WooCommerce without using a plugin.
How to change the price in WooCommerce for individual products
- Head into your site's admin dashboard.
- In your WordPress dashboard, navigate to Products → All Products.
- Locate the specific product whose price you want to change and click on the product to edit it.
- In the Product Editor, scroll down until you find the Product Data section.
How to change the price in WooCommerce for simple products
- Select the "General" tab from the "Product Data" module.
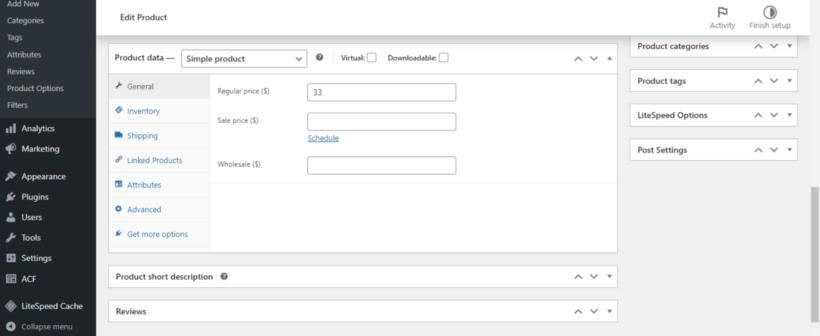
- Enter the new price in the "Regular Price" field. If you want to offer the product at a discount, enter the sale price in the "Sale Price" field.
- Scroll up and hit "Update" to save the changes.
Changing the price for variable products in WooCommerce
- Select the "Variations" tab from the "Product Data" module.

- Select the "Edit" button next to each variation to expand its settings. Update the regular and sale price fields.
- Scroll up and hit "Update" to save the changes.
How to change the price in WooCommerce for grouped products
Grouped products don’t have their own prices. Instead, they're linked to individual simple products. To change the prices of a grouped product, follow the steps above to change the price for each simple product within the group.
Changing the price for external/affiliate products in WooCommerce
- Select the General tab from the "Product Data" module.
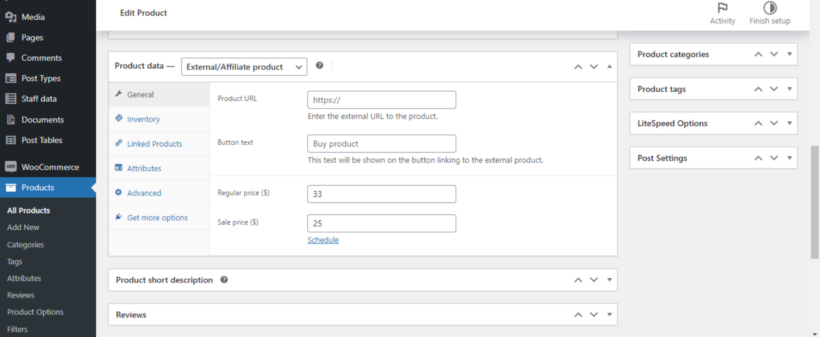
- Update the new prices in the "Regular Price" and "Sale Price" fields, as appropriate.
- Scroll up and hit "Update" to save the changes.
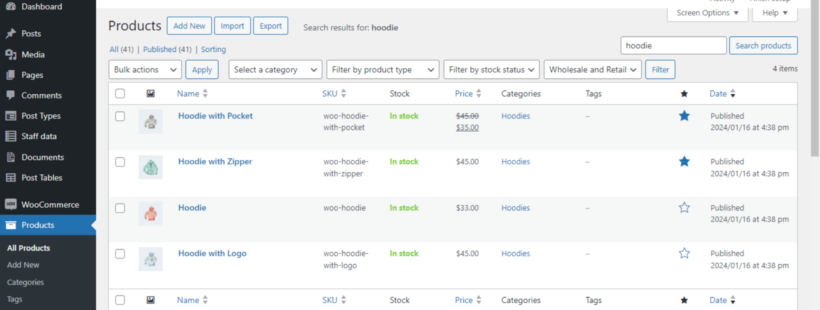
How to change the price in WooCommerce using the bulk product editor
- Head into your WooCommerce site's admin dashboard.
- In your dashboard, navigate to Products → All Products.
- Locate the specific products whose prices you want to change and check the box next to each product.
- Scroll up to the "Bulk Actions" dropdown menu at the top of the product list.
- Select "Edit" from the dropdown menu, then press "Apply".
- In the Product Editor, scroll down until you locate the Product Data section.

- Look for the "Price" and "Sale Price" fields. Select the change you want to make to all selected product prices — either increase or decrease by a fixed amount.
- Scroll down and hit "Update" to save your changes.
How to the change price in WooCommerce for multiple products via a CSV file
- In your site's admin, go to Products → All Products and select "Export".
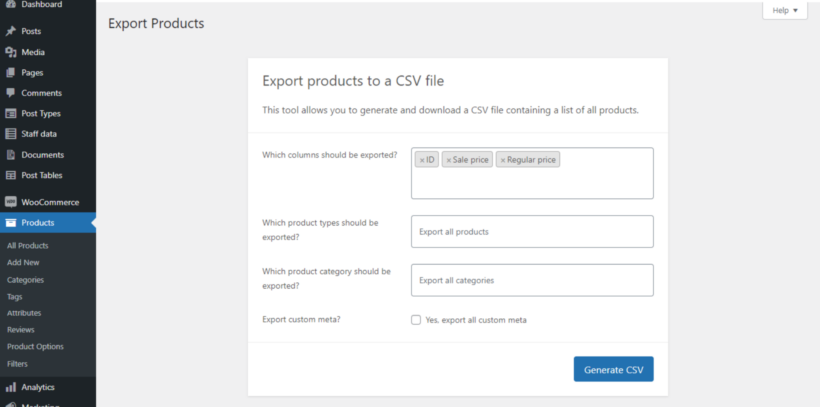
- Choose the columns you want to export. For this purpose, the most important columns are the "ID", "Regular price" and "Sale price".
- Press "Generate CSV" and download the file.
- Open up the CSV file using a spreadsheet program like Microsoft Excel or Google Sheets.
- Locate the "ID", "Regular price" and "Sale price" columns.
- Change the prices as appropriate. Make sure not to change the IDs, as these are essential for matching the products in your store.
- Save the file as a CSV after all the updates.
- Head back into your site's admin, navigate to WooCommerce → Products, and press "Import" from the top of the page.
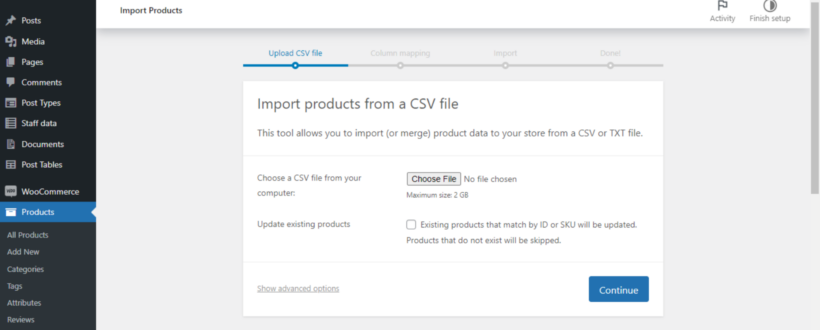
- Click "Choose File" and select the CSV file with updated product prices from your computer.
- Tick the "Update existing products" checkbox and click "Continue".
- Map the fields from your CSV file to the correct WooCommerce product fields.
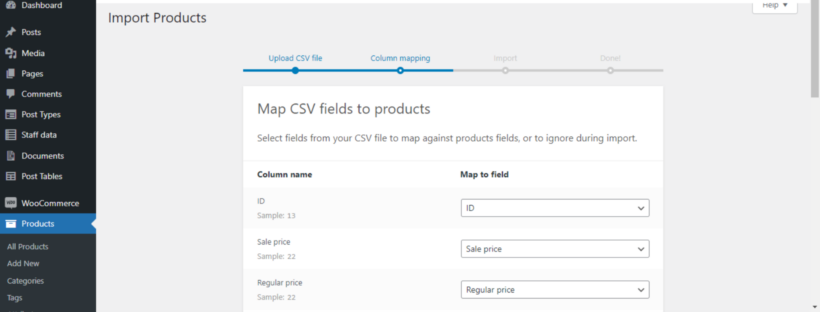
- Press "Run the Importer".
That's it. Once the import is complete, go to WooCommerce → Products and check a few products to verify that the prices have been updated correctly.
Plugin 1: Change product prices in bulk with Setary
As you can see, WooCommerce's built-in options for changing product prices are quite basic and not very user-friendly. That's where Setary comes in.
Setary is a fully featured WooCommerce bulk editing tool. It lets you:
- Bulk update all product data, including making price changes.
- Quickly search for, filter and select multiple products and then change their prices.
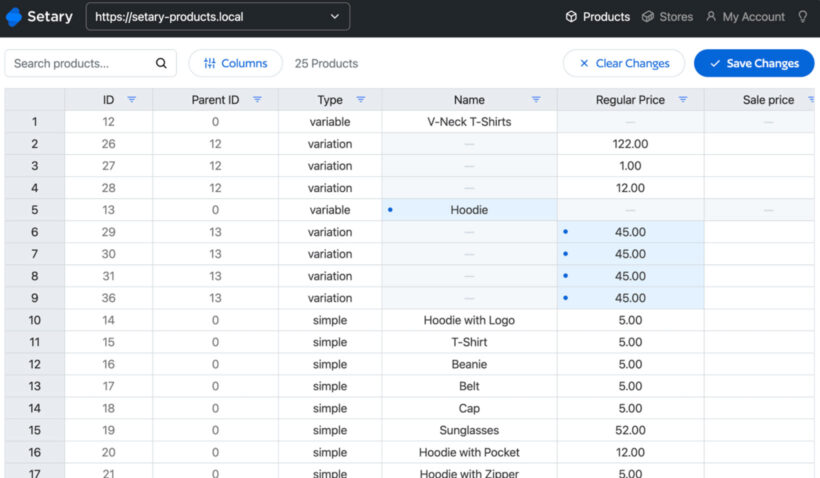
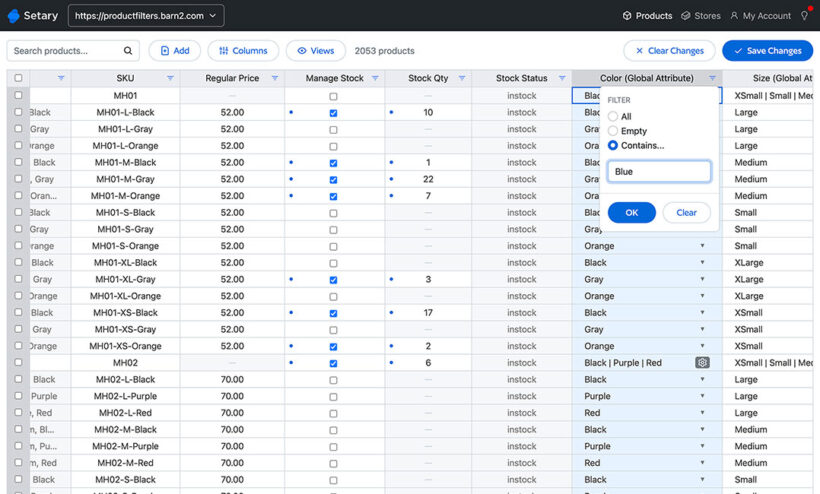
- Change regular and sale prices for products and variations inline using a spreadsheet interface like this:
- Or apply bulk prices to selected products like this:
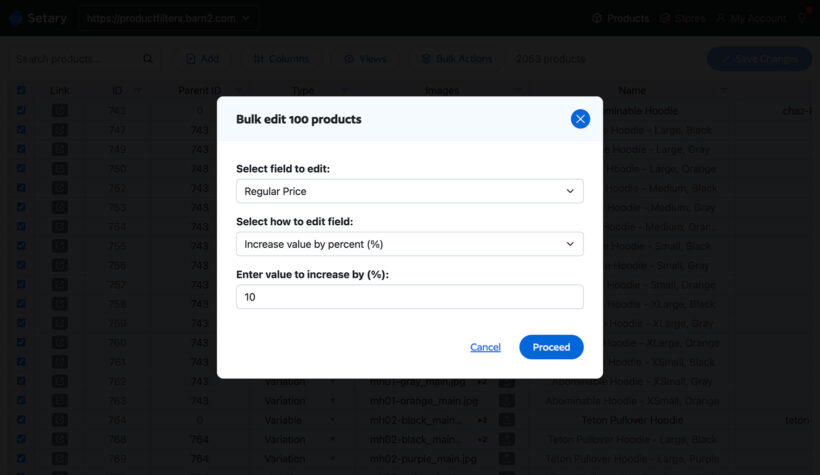
- Select from a wide range of bulk actions, for example to change the price by a fixed amount or percentage, add an extra digit to the price, and more.
I highly recommend Setary if you want to change the price of WooCommerce products in bulk, without having to visit a separate page for each product. Refer to this guide for a detailed setup tutorial.
How to use Setary to make bulk price changes
- Sign up for a Setary plan.
- Follow the onscreen prompts to install the Setary helper plugin on your WordPress site.
- Return to the Setary website and click 'Add Store' to link your plan to your store.
- You will then be directed to the Setary bulk editing app.
- Use the Columns button to make sure that all the relevant price columns are visible:
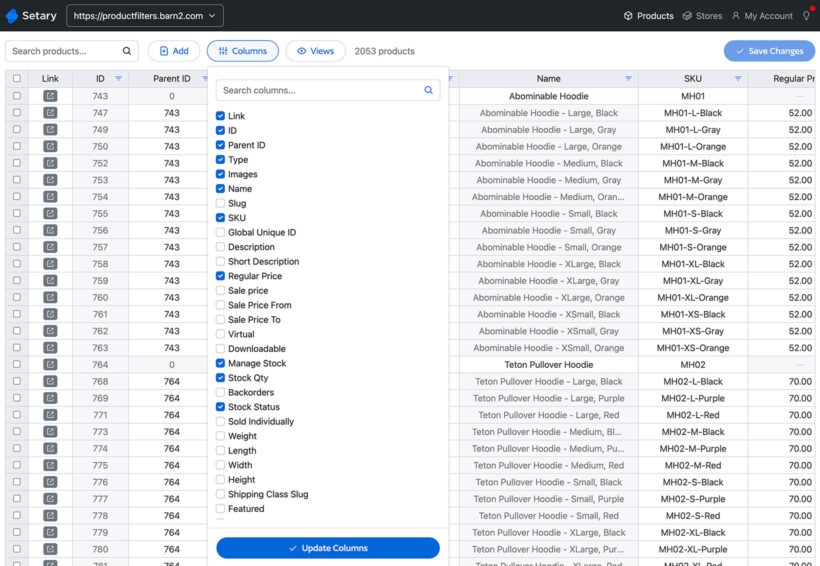
- Either click in a cell to update product and variation prices inline, or select products and use the 'Bulk Actions' button.
- Finally, you can see all the price changes in the spreadsheet with a blue dot alongside. Check they look correct, and then click 'Save'.
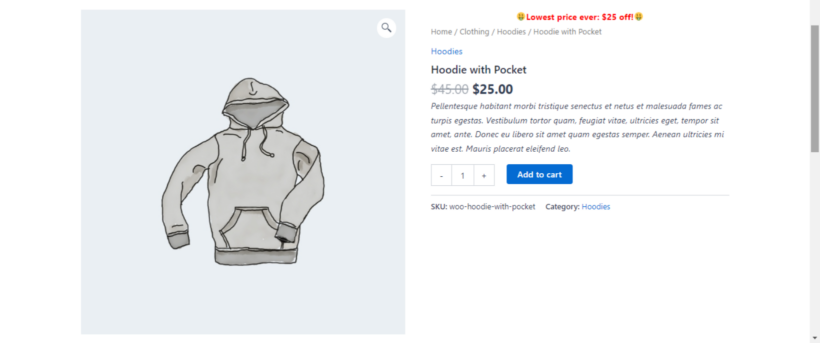
Plugin 2: Run sales and discounts with WooCommerce Discount Manager
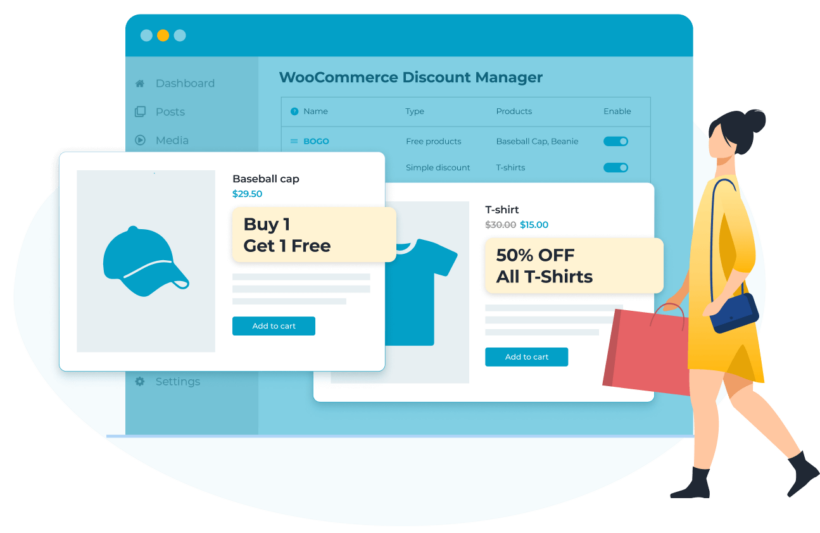
If you want to change product prices to create a sale or discount offer, then you need WooCommerce Discount Manager.
This powerful dynamic pricing plugin that lets you easily slash product prices for various types of sales. It lets you:
- Change prices based on various types of discount offers. Think: fixed percentage or amount off, tiered price, bulk price discounts, etc.
- Add advanced pricing rules and conditions to fine-tune how the discounted prices are calculated and applied. For instance, you can add quantity-based bulk pricing rules, apply discounted prices only to specific user roles, etc.
- Apply discounted rates together with pricing rules and conditions to all products, specific product categories, or specific products with only a few clicks. This dramatically reduces the time and manual effort required to change prices.
- Add start and end dates to schedule how long the products are available at discounted prices. The prices automatically revert to the original ones as soon as the sale period ends.
- Add custom message promos to shout out the discount prices on the single product pages of eligible products and during the checkout process.
Not to mention, the whole process is completely pain-free for customers. They don't have to apply coupon codes or do anything to take advantage of the special prices. It's automatically applied to eligible customers.
Let's look at how to set it up on your website.
How to change prices with WooCommerce Discount Manager
For this tutorial, I'll show you how to configure the plugin to change prices across multiple products by a fixed percentage.
Step 1. Create the discounted price offer
- Get the WooCommerce Discount Manager plugin and activate it on your site.
- Navigate to Marketing → Discounts in your WordPress admin.
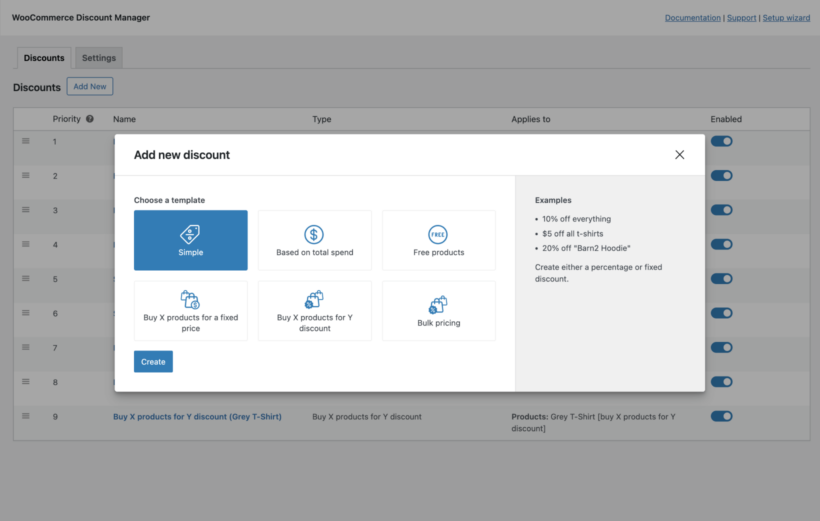
- Press "Add New".
- Give the discount offer a name.
- Pick "Simple discount" as the desired discount type.
- "Which products?" - Specify the products that are eligible for the discounted price: all products, particular product categories, or particular products.
Step 2. Specify products, add conditions, set availability, and more
- Next, specify the products or categories for the discounted price apply to (you'll only see this if you chose to discount particular products or particular products in the previous step).

- Define the fixed percentage amount off.
- Enable the sale badge feature to add WooCommerce's native label to products now available at the discounted price. This will be visible on WooCommerce product pages, shop page, product recommendations, and more.
- "Applies to" - Specify who you wish to apply this price change, whether everyone, selected roles, and selected users.
- "Availability" - Click on "Always available" to offer discounted prices indefinitely and "Specific dates" to schedule it.
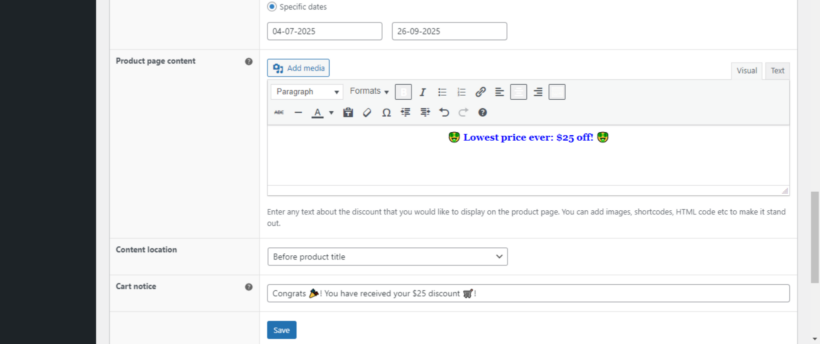
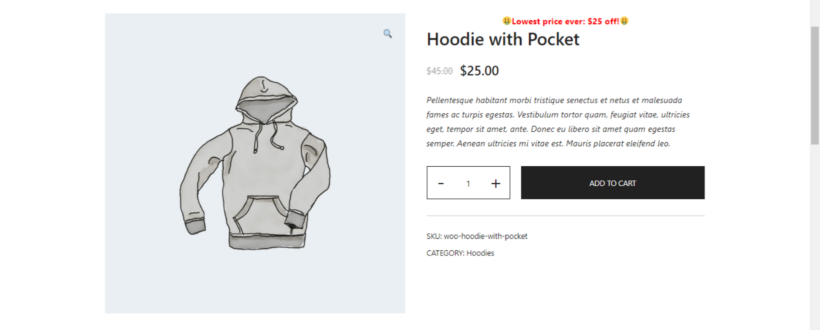
- "Product page content" - Add a custom promo message to the WooCommerce product page to tell customers about the discounted product prices. For example, "🤑Lowest price ever: $25 off! 🤑".
- Decide where you want the custom sale banner and price displayed on the product detail page.
- "Cart notice" - Add another custom message promo to the cart page. For example, 'Congrats 🎉! You have received your $25 discount 🛒!'.
- Hit "Save".
And that's it. Head to the front end to view the price changes.
Plugin 3: Make role-based price changes with WooCommerce Wholesale Pro
WooCommerce shops that sell to both retail and wholesale customers need a way to change the price for wholesale buyers. So it makes sense to invest in a plugin that allows for wholesale-specific pricing. There may also be a need to hide prices from retail customers.
Enter: WooCommerce Wholesale Pro.
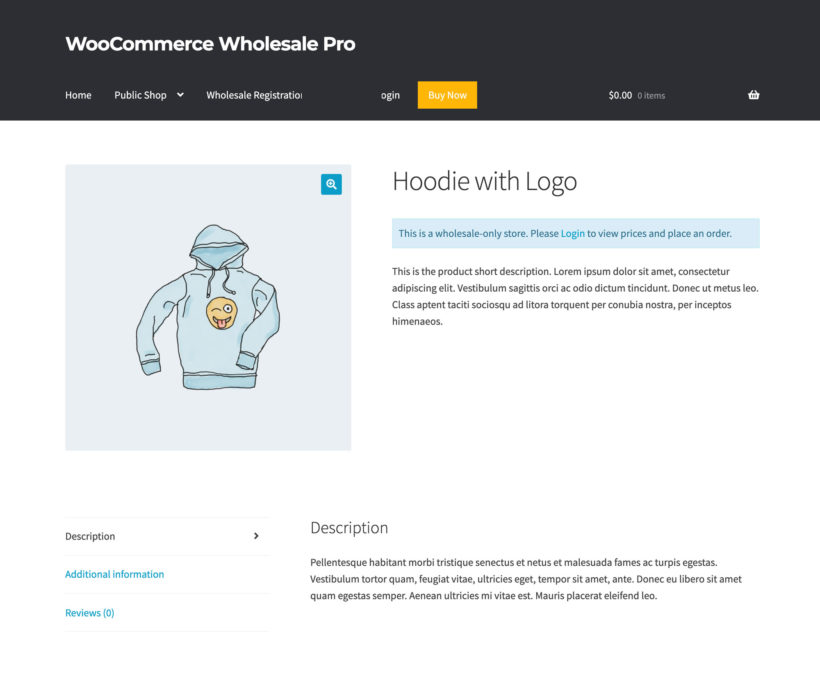
WooCommerce Wholesale Pro is a simple-to-use plugin that lets you create user roles in your store and change prices for users based on their roles.

It creates a wholesale version of your store so you can change the prices for B2B users without affecting their retail prices. Wholesale and retail users will see the same products, but their prices will vary based on their assigned roles.
Depending on your preferences, you can even choose to hide prices completely for logged out users.
You can also use WooCommerce Wholesale Pro to impact other pricing behaviors, such as whether each user role is taxable or tax-exempt and determine whether the wholesale discount for an item should include or exclude sales prices that affect the base price of the item.
Top features of WooCommerce Wholesale Pro
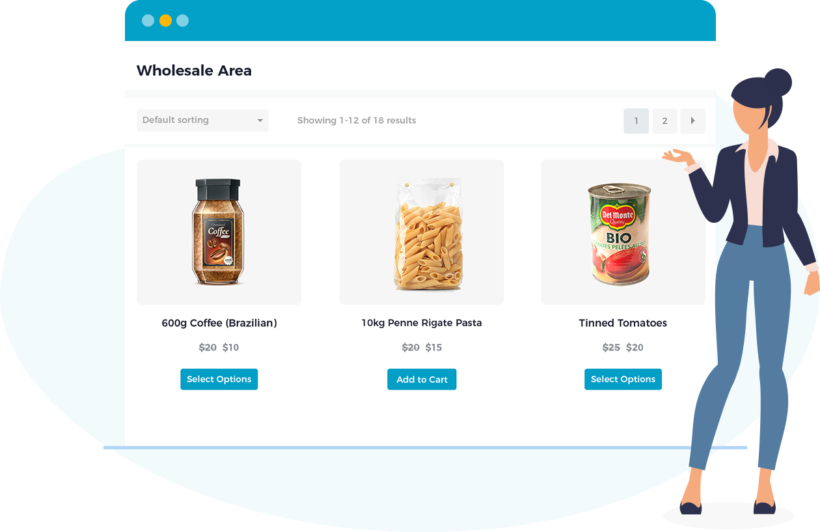
- It lets you add as many wholesale roles as needed, each with custom pricing.

[/image_border] Add unlimited wholesale user roles to the wholesale store - You can set up storewide and category-specific percentage discount offers. This knocks off the prices of eligible products in minutes.
- It lets you add wholesale price rates for individual products — whether simple, variable, or external.
How to change prices with WooCommerce Wholesale Pro
- Add the WooCommerce Wholesale Pro plugin to your site.
- Set storewide discounts for each wholesale role:
- Navigate to WooCommerce → Settings → Wholesale → Roles in your WordPress site's admin.
- Select the role that you wish to add a wholesale discount to.

- Enter the discount percentage in the 'Discount' field. Don't add the "%" symbol.
- Hit "Save changes".
That's about it. Repeat the steps to add more percentage discounts for other wholesale user roles.
A quick note: Refer to this guide for more details, including how to set category-specific, product-specific, and variation-level discounts which will change prices for each wholesale role.
Best practices for managing your WooCommerce store's pricing strategy
These tips will help you understand the impact of price changes and boost sales and revenue in your ecommerce store:
- Use Google Analytics and WooCommerce analytics reports: WooCommerce provides decent built-in analytics and reports to track sales performance. You can sync Google Analytics on your website to better understand customer behavior. Keep an eye on metrics like total sales, average order value, and the number of orders before and after implementing pricing changes.
- Conduct A/B tests: With A/B testing, you compare different pricing strategies to see which performs better. A simple way to do this with WooCommerce Wholesale Pro is to create user roles to add two separate groups of customers with identical attributes. Then test different prices for the same products and analyze which price point is better for your business.
Monitor revenue, profit margins, average order value, customer acquisition costs, and other key performance indicators (KPIs) over time and use them as a reference point for future pricing-related decisions.
Related tutorial: How to set up WooCommerce attribute pricing in your store.
That's how to change the price in WooCommerce!
It's pretty normal for ecommerce stores of all sizes to change prices and other product details from time to time. WooCommerce's default options work fine if you're updating the price for a handful of items. However, they can be tedious and aren't ideal if you have a large product inventory.
I've shown you how to change product prices in WooCommerce using its built-in options. I also shared the top plugins and tools to make the process quicker and hassle-free:
- Setary - The best tool for making bulk price changes in WooCommerce.
- WooCommerce Discount Manager - The best plugin to change prices for sales and discount offers.
- WooCommerce Wholesale Pro - The best plugin to change prices in WooCommerce based on user roles.
Get started with these plugins and change WooCommerce prices in minutes!